

How To Make Glass Templates
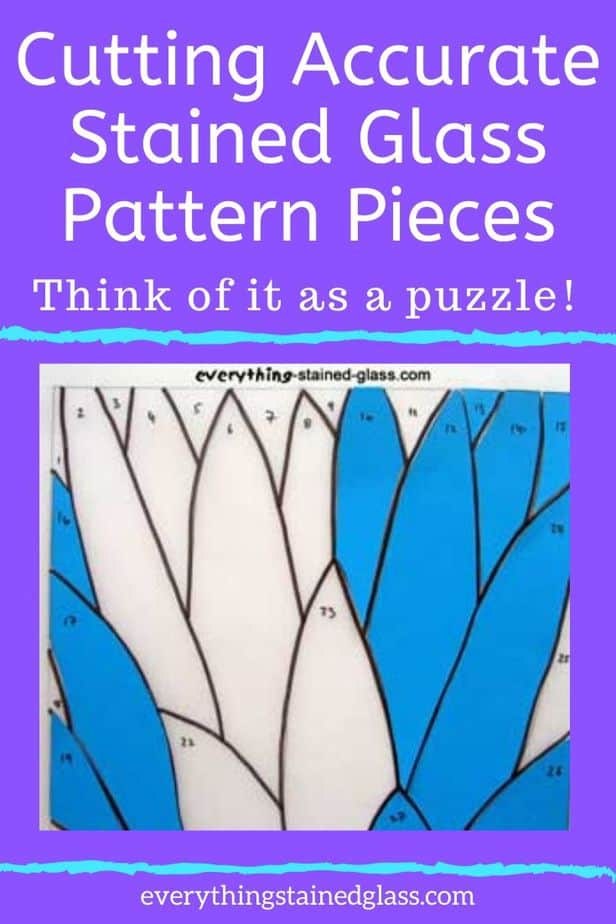
Making Stained Glass Templates That Fit
Authentic stained glass templates are crucial for creating cute panels. One time you've designed or found a stained drinking glass pattern that you're happy with, the next matter you lot need to do is make copies of it and cut the individual shapes out accurately. These will be used as templates for cut all your drinking glass pieces. You can cut stained drinking glass templates well-nigh accurately with Foil Shears* or Lead Shears*, depending on which construction technique you're using.
(This article contains some affiliate links – look for the *. Merely and then'southward y'all know, if you lot click and buy through the link within 24 hrs I get a small % from Amazon, (not y'all!). Thanks in advance only no worries if you take a local store – I'd always support them showtime 🙂 )
How to Cut Stained Glass Templates
The following steps are all easy merely information technology's worth taking a scrap of fourth dimension doing them accurately. Recall of it every bit a puzzle. If any of the pieces don't fit, making the final picture show will exist hard.
What you need:
Your stained drinking glass design. Strong tracing paper. Carbon paper. Sparse menu. A pencil. Scissors.
For copper foil construction: Fine felt tip pen. Pattern shears for copper foil.*
For lead came construction: A i/16 (2mm) black felt tip pen. Atomic number 82 pattern shears.*
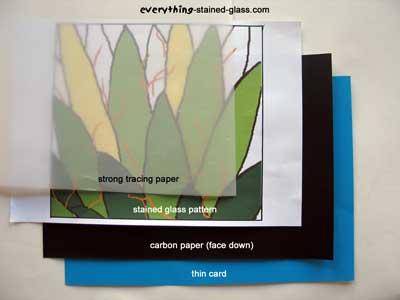
1. Making Copies
This is all well-nigh the order:
- Put the card at the lesser. And so the carbon newspaper (face down), followed by your pattern. The tracing paper goes on acme of the pile.
- Pin or stick the edges downwards. It's very important that zip moves at this stage.
2. Tracing And Numbering The Shapes
- With the pencil, draw over the pattern with a constant, house pressure. You desire to make sure that the pattern reads clearly on the sparse card at the bottom.
- It's very important to number the shapes now, when all the pieces are together. I number mine at the tiptop of each shape. This makes it easier when I'm trying to find how they fit together afterwards they're all cut.
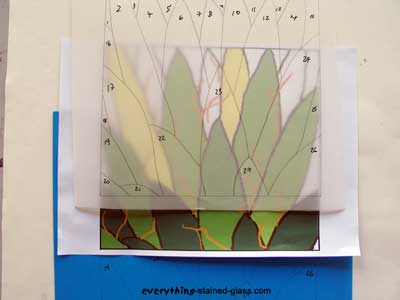
At this stage you should have your pattern drawn on the tracing newspaper and the sparse card.
- Put bated the carbon newspaper and your stained drinking glass pattern.
- For foil:
On the tracing newspaper, become over all the lines – except the outside lines – with the fine pen. This will exist used for assembling your panel when you lot're fix. - For lead came:
Do the same as above, just this time with the i/xvi″ (2mm) thicker pen. This line represents the gap which the middle of the pb volition fill later.
3. How To Cutting The Stained Glass Templates Pieces
- Now move on to the sparse card. You are going to cutting the stained glass templates from this. Cut neatly around the border of the whole pattern with regular scissors.
- The next step is to cutting a thin strip of carte out between each shape. Why? Because either the width of the copper foil and solder, or the heart of the stained glass lead came volition fill the gap when you lot assemble the panel. This means that you accept to cutting all the drinking glass pieces a tiny bit smaller to make room for the foil and solder or center of the lead.
- Luckily, the copper foil and lead shears are designed to cutting the correct amount of card away from your design. But place them so that the line is in betwixt the two outside blades.
Cut around each blueprint slice. Do it slowly, especially effectually corners, as the strip tin can become caught upwardly. Pause it off every inch or so to cease this happening. You tin can rub candle wax on the blades to prevent the sparse strips sticking. - Once y'all've cut them all, check their accurateness by placing them on the tracing paper. You should be able to see the black felt pen line between each shape. The photo below may assistance.
- Make sure yous take the right shears for the technique you are using, either copper foil or lead. The pb shears cut a wider one/xvi″ (2mm) slice than the copper foil ones.
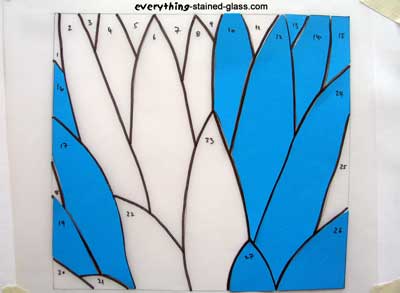
By now yous should take:
- ane coloured blueprint or design
- one sheet of tracing paper, with your design fatigued in either a fine line (copper foil) or a thicker 1/xvi″ (2mm) line (lead came)
- each shape numbered on the tracing newspaper
- all your stained glass templates cut out of thin menu and numbered

If this is the case then y'all're fix to starting time Stained Glass Cut.
Make a Double-Bladed Knife for Cutting Templates
Do yous find copper foil pattern shears catchy to use? If you struggle with the paper getting stuck or hurting your hands so this idea will help yous.
It'due south an ingenious fashion to adapt a box cutter to create the perfect alternative for design shears.
This idea was shared past Georgia Hamilton who kindly gave permission for me to pass information technology on to you. Thanks Georgia 🙂
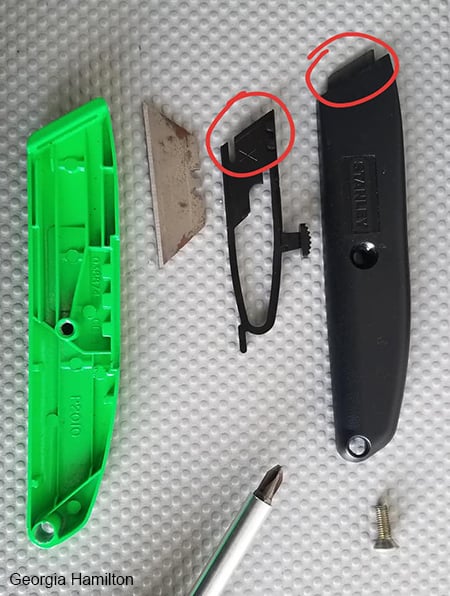
Taking The Knife Apart
one. Take your box cutter apart. Take notes about how it will fit back together. Yours may be slightly dissimilar .
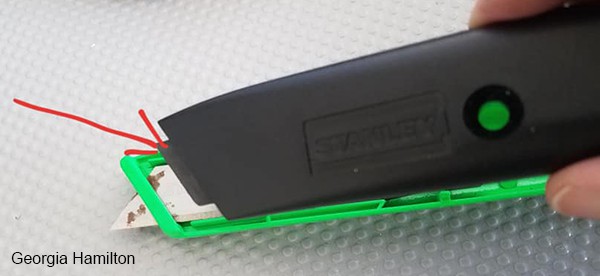
two. The two areas of importance are circled in blood-red. They will need adjusting for the added thickness of the boosted blade.
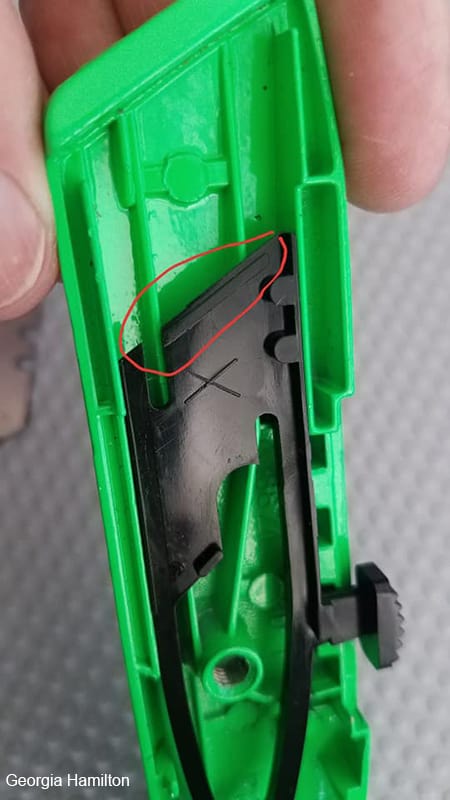
Sanding Downward
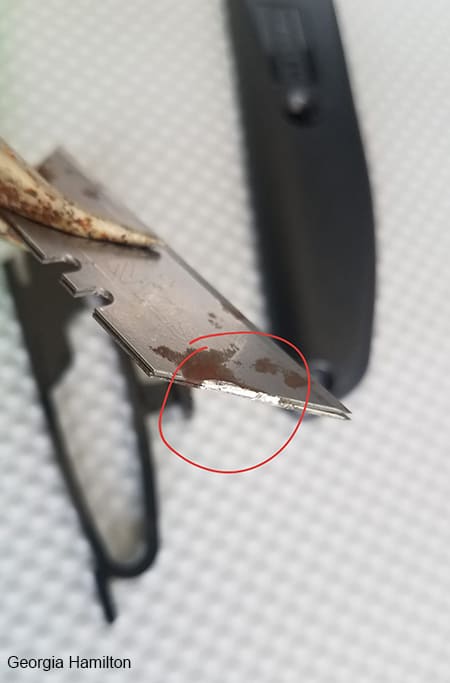
3. Hither's a close up of 1 of the areas you'll need to sand downwards to adjust the 2 blades. The black plastic slice has a fiddling ridge. Don't sand downward more of the ridge than you lot have to as information technology helps stabilise the blade(due south). You lot want the double blade to fit on the slider at the same even depth as the single bract did.
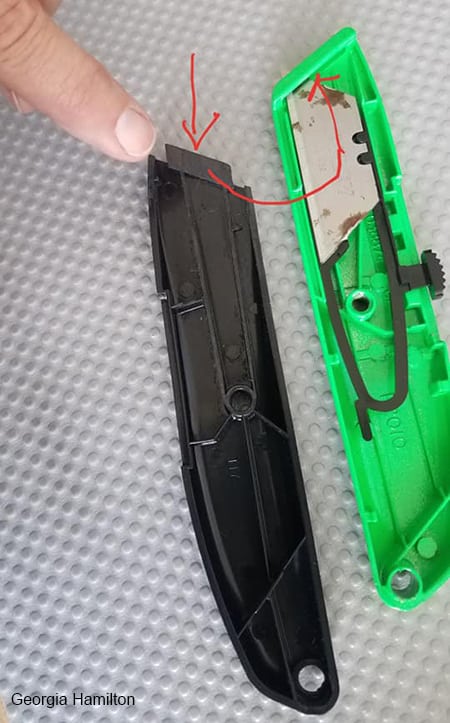
4. The tab hither rests on top of the blade when the handle piece is turned over. It fits into the same slot every bit the blades and so it will also need to be sanded a bit to compensate for the added thickness of 2 blades.
*Important – sand the side of this tab that is contact with the blade – the within of the black handle piece. Don't sand whatsoever other ridges on this piece, just the tab and only every bit much as necessary. Go on checking the fit. This will assist keep the blades fitting snugly.
Soldering two Blades Together
5. Use pliers to concord the blades together while placing a dab of flux and soldering. Just a smidge on both ends will hold the blades together.
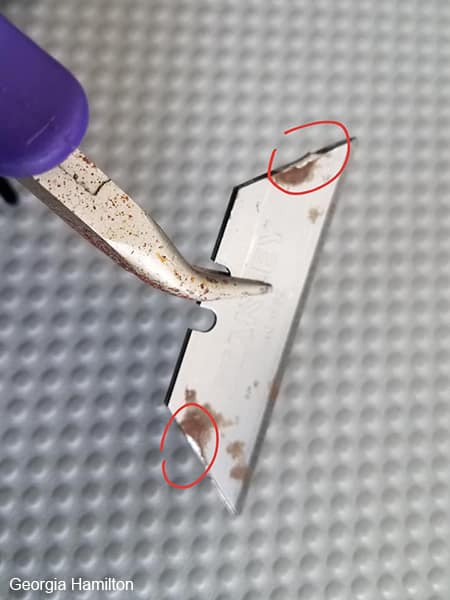
If you're using them for foil construction yous don't need to do any spacing of the blades. The blades are tapered at the edges (like a knife edge is) so the upper function of the bract provides the space needed to cut the correct width for foil construction.
You tin see this natural gap in the blades below.
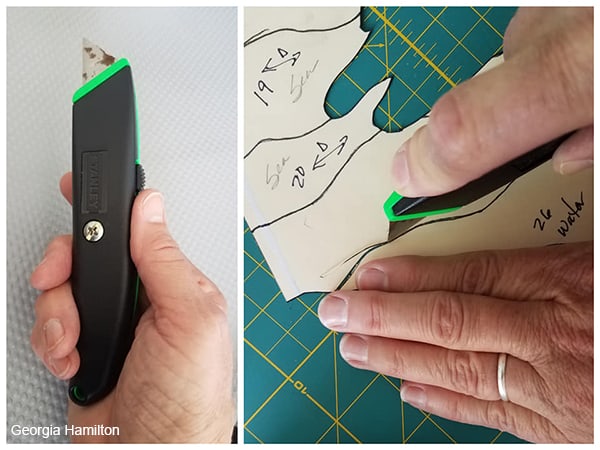
Putting It Dorsum Together
6. Reassemble the cutter making sure the tab (circled in red) goes into the slot with the blades. The ii handles should fit together smoothly. If not, yous may need to sand a bit more.
The beauty of the box cutter blades is that when one side gets tiresome, you simply take the blade out and reverse it.
Georgia got the thought after watching a video of a master glass artist at work cutting out a pattern with a (vintage) double bladed tool that looked something like a modified lead knife. Excellent all round, thanks Georgia 🙂
There is more than help with the copper foil technique here if you're interested
Return to Everything Stained Glass home page

How To Make Glass Templates,
Source: https://everythingstainedglass.com/stained-glass-how-to
Posted by: lentzwhimes.blogspot.com
0 Response to "How To Make Glass Templates"
Post a Comment